
Keep learning
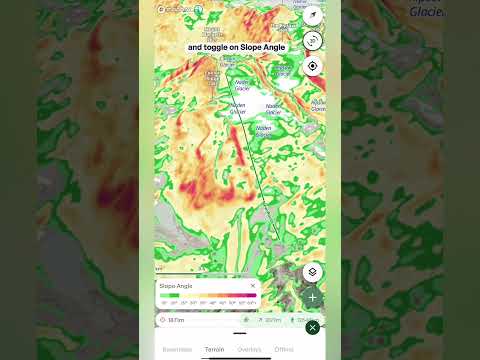
Slope angle layer
Slope angle shows how steep the terrain is in color bands, so you can see at a glance what's gentle and what's steep.
Turning it on
- Open the layers menu Tap the layers button on the map, go to the Terrain tab and tap Slope angle. To turn it off, tap it again. A small number on the Terrain tab shows how many terrain layers are switched on.
Reading the colors
- The scale A legend card appears on the map with a scale running from 10° to 60° and over. Match any patch of color on the map to the scale to read its steepness.
- From green to purple The gentlest slopes are green, then the colors warm up through yellow and orange, into red and pink as the terrain gets steep. Purple marks the steepest ground on the map, 60° and over, such as cliffs and rock faces.
- Slope angle vs Avalanche risk Slope angle shows steepness in small steps, so you can read the angle of any slope. Avalanche risk groups the same angles into a few key bands, so you can see the important range at a glance.
Controls
- Opacity slider The slider is located at the top of the Terrain layers menu. Drag it down to fade the colors so you can see the satellite imagery or topo map underneath, or up to make the angles stand out.
What it's good for
- Choosing a line See where the steep pitches are and where the terrain eases off, so you can pick a line that suits your group and the day.
- Planning the approach Find the gentler ground to travel on, and spot where your route has to cross steeper slopes.
- Pairing with other layers Use it with Slope aspect, Avalanche risk and the Avalanche forecast overlay to build a fuller picture of any slope before you go.
Aspect layer
Outmap's Slope aspect layer colors the map depending on which direction each slope faces, so you can see at a glance which slopes get the sun and which stay in the shade.
Turning it on
- Open the layers menu Tap the layers button on the map, go to the Terrain tab and tap Slope aspect. To turn it off, tap it again.
Reading the colors
- The compass legend A compass appears in the bottom corner of the map. Each direction has its own color, for example blue means a slope faces north. Match any slope to the compass to see which way it faces.
- Sun and shade In the northern hemisphere, north-facing slopes get the least sun, so the snow often stays colder and drier for longer. South-facing slopes get the most sun and warm up faster, which can have big implications for avalanche safety. The colors blend between directions, so a slope facing between two directions shows a color in between.
Opacity
- Opacity slider The slider is located at the top of the Terrain layers menu. Drag it down to fade the colors so you can see the terrain underneath.
Tip: avalanche forecasts normally tell you which aspects to watch out for. Pair Slope aspect with the Avalanche forecast overlay and you can see exactly where those aspects are on the map. Knowing exactly what aspect you're skiing is an essential tool for finding the best snow on the mountain, and for checking it's safe.
Avalanche risk layer
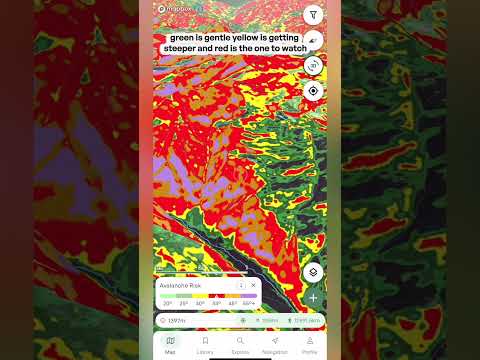
Shade the map by slope angle to see which terrain is steep enough to slide, from gentle green through to the red band where avalanches most commonly start.
Turning it on
- Open the layers menu Tap the layers button on the map to open the menu, then go to the Terrain tab and tap Avalanche risk. The map is shaded straight away, and a legend card appears at the bottom of the screen. Open the layers menu again and tap Avalanche risk to switch it off.
Reading the colors
- Green and yellow, 20° to 34° Green is gentler ground, below the angles where avalanches usually start. Yellow, from 30°, is getting steeper, and avalanches become possible here when conditions are very unstable.
- Red, 34° to 45° The key band to watch. These are the angles where avalanches most commonly happen, often called prime avalanche terrain. A warning triangle on the legend marks this range.
- Orange and purple, 45° and over Very steep ground, up to the steepest terrain on the map. Snow on slopes this steep tends to shed in smaller slabs and sluffs.
The info icon
- What the colors mean Tap the info icon on the legend card for an explanation of how the layer works, plus a diagram of what happens at each slope angle and a link to an article that goes deeper.
Opacity
- Opacity slider The slider is located at the top of the Terrain layers menu. Drag it down to fade the colors so you can see the satellite imagery or topo map underneath, or up to make the angles stand out.
Important: this layer only highlights the slope angles that avalanches typically form on. Real avalanche danger also depends on the snowpack, the weather and how the slope is triggered. It's for planning only and should never be relied on for critical safety decisions, so use it together with the Avalanche forecast overlay, and always rely on your own training and judgment.
Terrain Shade Layer
See how the sun shades the terrain at a chosen time of day and date. Drag the time slider to watch the shade move across the mountain through the day.
Turning it on
- Open the layers menu Tap the layers button on the map, go to the Terrain tab and tap Terrain shade. The description underneath reads "Sun shade by time of day and date." To turn it off, tap it again. A small number on the Terrain tab shows how many terrain layers are switched on.
The controls
- Date Pick the day you want to look at from the dropdown, which covers the month before and the month after today. The sun sits at a different angle as the season changes, so set this to the day of your trip. Best for: planning ahead, not just for today.
- Local time A slider covering the whole day, from 12 AM to 11:59 PM. Drag it to move to a different time and the shaded areas update. The light green part of the slider marks the hours of daylight. The time shown is local time at the spot you're looking at. Best for: finding out when a slope comes into the sun or drops into shade.
- Opacity slider At the top of the Terrain layers menu. Drag it down to fade the shading so you can see the terrain underneath.
What it's good for
- Snow quality Slopes that stay in shade tend to hold colder, drier snow, while slopes in the sun warm up. Check a slope at the time you'll be on it.
- Timing your day Work out when the sun reaches your objective, when a cold start will warm up, and when a slope will fall into shade again in the afternoon.
- Camp and break spots Find somewhere that gets the morning sun, or somewhere that stays shaded and cool.
- Photos and video See when the light will reach a face or a ridge, so you can plan when to be there.
Flat Areas Layer
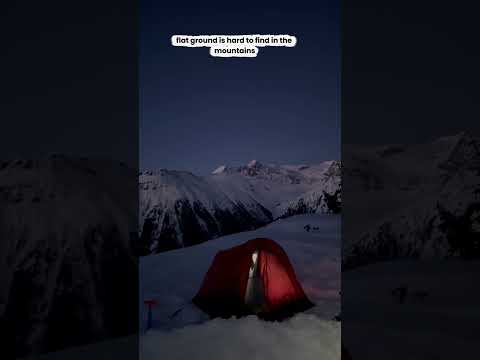
Flat areas lights up all the low-angle terrain in bright green, so you can spot a flat place to camp, swap your skins or take a break before you leave home.
Turning it on
- Open the layers menu Tap the layers button on the map, go to the Terrain tab and tap Flat areas. The description underneath reads "Highlights low-angle terrain." To turn it off, tap it again. A small number on the Terrain tab shows how many terrain layers are switched on.
Reading the map
- Bright green Anywhere that's bright green is flat terrain. The rest of the map stays as it was, so you can see exactly where the flat ground is and how it sits in the terrain around it.
What it's good for
- Camp spots Find somewhere flat enough to pitch a tent, so you don't have to sleep on an angle all night.
- Breaks and stopping points Find somewhere to swap your skins, have lunch or take a break, and plan your stopping points along the route.
- Plateaus and saddles See where the terrain eases off along a ridge or between peaks, so you know where to expect a break in the climbing.
- Emergencies and bad weather Knowing where the flat ground is can help if you need to be rescued or the weather turns and you want to get off exposed terrain. Low-angle ground can be easier to move across, easier to stop on and a more practical place to stage a rescue, so it's worth knowing your options before you head out.
Important: flat doesn't mean safe. Low-angle terrain can sit below or beside steep slopes, so overhead hazards like avalanche terrain, cornices and rockfall can still be present. Check what's above and around any spot before you stop, shelter or camp there.
Elevation Bands Layer
Color the whole map by altitude, from light green down low to the darkest bands up high, so you can see at a glance how high everything sits.
Turning it on
- Open the layers menu Tap the layers button on the map, go to the Terrain tab and tap Elevation bands. To turn it off, tap it again. A small number on the Terrain tab shows how many terrain layers are switched on.
Reading the map
- Light green to dark The whole map is colored by altitude. Light green is the lowest ground and the bands get darker the higher you go, so the summits show up as the darkest bands.
- The scale Look at the scale in the bottom left of the map. It shows which color matches which elevation range, so you can read the height of any spot straight off the map. Best for: tilting the map into 3D and seeing how the mountain stacks up from valley to summit.
What it's good for
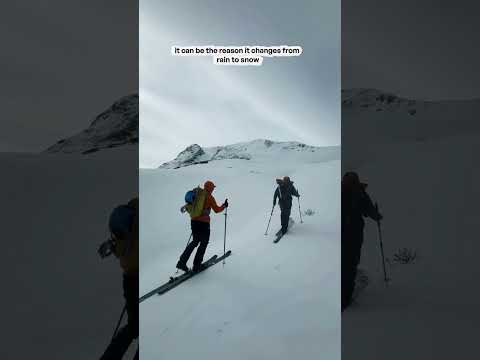
- Matching the forecast Weather in the mountains changes with elevation. Plot a route, check the freezing level in the route's Weather tab, then use Elevation bands to see exactly which parts of your route sit above or below it.
- Treeline If you know roughly where the treeline sits, you can see where your route climbs out of the trees and into more open terrain.
- Judging the climb See how much height you gain and where the big steps up are, without reading contour lines.
- Comparing objectives See at a glance which peaks, ridges and basins sit higher than the others around them.
- Pairing with other layers Use it alongside layers like Slope angle to build a fuller picture of the terrain.
Custom Terrain Layer
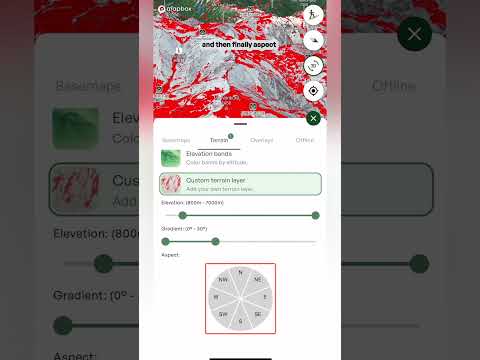
Build your own layer by choosing an elevation range, a gradient range and the aspects you want, and the map highlights only the terrain that matches all three.
Turning it on
- Open the layers menu Tap the layers button on the map, go to the Terrain tab and tap Custom terrain layer. The controls for building your layer appear underneath.
The three filters
- Elevation Drag the two handles to set the lowest and highest elevation you want. The range is shown above the slider. For example: if the forecast says rain below 1,800 metres, set your range from 1,800 metres up to stay in the snow.
- Gradient Drag the two ends to set how steep the terrain should be (it's called Angle on the web app). The range in degrees is shown above the slider. For example: if the avalanche risk is high, you may want to stay on slopes under 30 degrees, so choose 0 to 30 degrees.
- Aspect Tap the directions on the wheel to choose which way the slopes face. Selected directions turn green (coral on the web app), and the ones you've chosen are listed above the wheel. For example: after a warm, sunny spell, tap north, northwest and northeast to find the colder, drier snow.
On the map
- The highlighted terrain Only the terrain that matches all three filters at once is shown, highlighted in red. Change any filter and the map updates.
- The legend A small card at the bottom of the map shows the settings you've chosen, so you can see at a glance what the layer is showing.
Tip: a custom layer narrows down where to look. Use it to find the terrain you want, then check conditions and the Avalanche forecast before you commit to a line. Steeper slopes above a gentle slope can still slide onto it, so look at what's above you too.
Heatmap layer
Use the heatmap layer to see where people have actually been skiing, hiking, climbing and riding. It's built from real recorded activities, so it shows which routes and trails get used in any area. That makes it a quick way to find an established line, see how popular somewhere is, or spot the quieter ground around it.
Backroad status
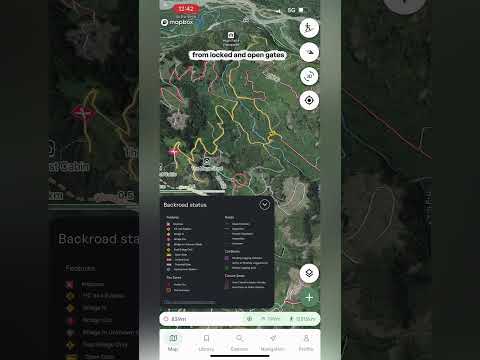
See the condition of backcountry roads in BC and Alberta before you drive them, from good, to degraded, to heavily degraded, to impassable, plus bridges, gates and closures.
Backroad status colors the forestry and backcountry roads on your map by their condition, so you can check the road to the trailhead before you leave home. The layer covers BC and Alberta.
Turning it on
- Open the layers menu Tap the layers button on the map, go to the Overlays tab and tap Backroad status. The description underneath reads "Road access updates for BC and Alberta." To turn it off, tap it again.
- The legend A Backroad status legend appears at the bottom left of the map. Tap it to open it, and tap the arrow to tuck it away again.
Reading the map
- Roads Every road is colored by its condition: green for good, yellow for degraded, red for heavily degraded, a black dotted line for impassable and a grey dashed line for unknown. Best for: spotting which sections of a road to trailhead are rough before you go.
- Features Icons mark the things that can stop you: an impasse, a high-clearance 4x4 bypass, a bridge in, a bridge out, a bridge in an unknown state, a foot bridge only, and open, locked and potential gates.
- Fire zones Active fires and fire perimeters are marked on the map.
- Cut blocks Pending logging activities, active or recently logged areas and retired logging areas.
- Closure zones Areas that are closed to motor vehicles, and areas that are open to them.
Recent bulletins
- Backroad Status website At the bottom of the legend there's a link to backroadstatus.com, which is where the road data comes from. Open it to read the recent bulletins, with updates from people who have recently done the road, like a note about a section of road. Best for: checking the latest word on a road, a bridge or a gate before you drive it.
Important: road conditions change quickly, and a bulletin might be days old by the time you read it. Check the date on any report, and be ready to turn around if the road isn't what you expected. Always rely on your own training and judgment.
Weather For a Point or Route
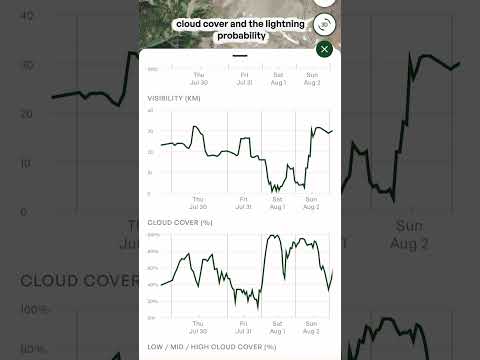
Open a waypoint or a saved route and tap the Weather tab to see the forecast for that exact spot: current conditions, a day-by-day forecast, an hour-by-hour look at the next 36 hours, and charts for things like precipitation, snow depth, temperature, wind and the freezing level.


Our Commitment